 Hair
How to take hair loss progress photos you can actually compare
Photograph the same areas (hairline, temples, mid-scalp and crown) from the same angle, distance and light, with hair dry and unstyled, every 4 weeks, and compare each photo against your first set rather than last week's. Consistency matters more than camera quality: a small change in lighting or angle can make hair look thicker or thinner than it really is.
General guidance, not medical advice. Your clinician's advice comes first.
Why the mirror misleads you
Hair loss and regrowth are both slow, and you see yourself every day. Day-to-day changes are far too small to notice, so the mirror shows "no change" whether you're improving, holding steady or slowly thinning. Then a bad day arrives and everything seems to have got worse at once.
The mirror also lies about conditions. Bathroom lights are usually directly overhead, which makes scalp show through more. Wet or freshly washed hair clumps and exposes more scalp than dry hair. Styling and products cover thin areas. And you can't see your own crown in a mirror at all. How anxious you feel that morning changes what you see, too.
Photos taken the same way every time take those variables out. Then when a photo looks different, it's more likely your hair changed and not just the light.
The five things to keep the same
1. Angle
Hold the camera at the same height and angle, with your head tilted the same way. A few degrees of tilt can make the crown look sparse or full. Stand in the same spot and use a reference you can repeat, such as eyes level with the lens for front shots.
2. Light
Use the same light every time: the same room, the same lamp or the same window at the same time of day. Soft, even light from the front is easiest to repeat. Harsh overhead spotlights exaggerate thinning. Don't mix flash and no-flash photos in the same series.
3. Distance
Keep the camera the same distance from your head, and don't zoom. Closer photos show more scalp between hairs. An arm's length, or a phone on a stand at a fixed spot, is easy to repeat.
4. Hair state
Photograph hair dry and unstyled, with no products, and ideally about the same time after washing. Wet hair shows more scalp. Length matters too: a fresh haircut changes how dense hair looks, so note it when you photograph.
5. Schedule
Photograph on a fixed schedule, not when you're worried. Every 4 weeks works well for most treatments. More often mostly adds noise, and less often makes it harder to see when a change began.
A photo schedule, stage by stage
Before day 1: baseline set
Take a full set of every area before you start a treatment, or as soon as you can. Everything later is compared against this set, so take a few shots of each area and keep the best-lit one. If you've already started, take your baseline today. A late baseline is much better than none.
Months 0–3: every 4 weeks
Early photos record your starting point and any early shedding, which is common with minoxidil and some people notice on finasteride. Don't expect visible improvement yet; these photos give you context later.
Months 3–12: every 4 weeks, compare every 3 months
Keep taking photos every 4 weeks, but make your real comparisons at month 3, month 6 and month 12 against your baseline. This is the window when most treatments show whether they're working.
Month 12 onward: every 1–3 months
Once results are clear, photos every 1 to 3 months are enough to confirm you're holding gains or to spot changes early. After a hair transplant, take photos weekly in the first month, then every 4 weeks until the final result at 12–18 months.
Which areas to photograph
Take each area as its own photo. One front-on selfie can't show the crown, and changes in one area are easy to miss in a wide shot.
Hairline
Take one straight-on photo with your hair pushed back and your eyes level with the camera, and one looking slightly down so the camera sees the hairline from above. Keep your eyebrows in frame as a fixed reference.
Temples
Photograph the left and right temples separately, at about 45 degrees, with hair pushed back. Temples recede and recover at different rates, so treat them as two areas.
Mid-scalp
Photograph the top of the head from above and slightly in front. If you wear a part, photograph it in the same place each time; a part shows density changes clearly.
Crown
The crown is the hardest area to photograph yourself and often the first place treatments like minoxidil show change. Use the rear camera with a timer or burst mode held above the back of your head, ask someone to take it, or mount the phone at a fixed point. Keep your chin tucked the same amount each time.
Donor area (after a transplant)
If you've had a transplant, photograph the back and sides too, to track healing and density.
How to compare photos fairly
- Compare the same area with the same area, and your latest photo with your baseline, not just with last month's.
- Look for a trend across three or more photos, not one unusually good or bad shot.
- Put photos side by side, or overlay them, rather than flicking between them from memory.
- If conditions clearly differed (new haircut, different room), note it and give that photo less weight.
What photos can and can't tell you
Consistent photos are an honest record of how your hair looks over time, and they make appointments far more useful. They're not a diagnosis. See a doctor if you notice sudden or patchy hair loss, rapid heavy shedding, or a painful, red, scaly or itchy scalp, because these can have causes that need a different approach. Bring your photo series with you: a doctor can see far more from a dated series than from a description.
How HairLog helps you take consistent photos
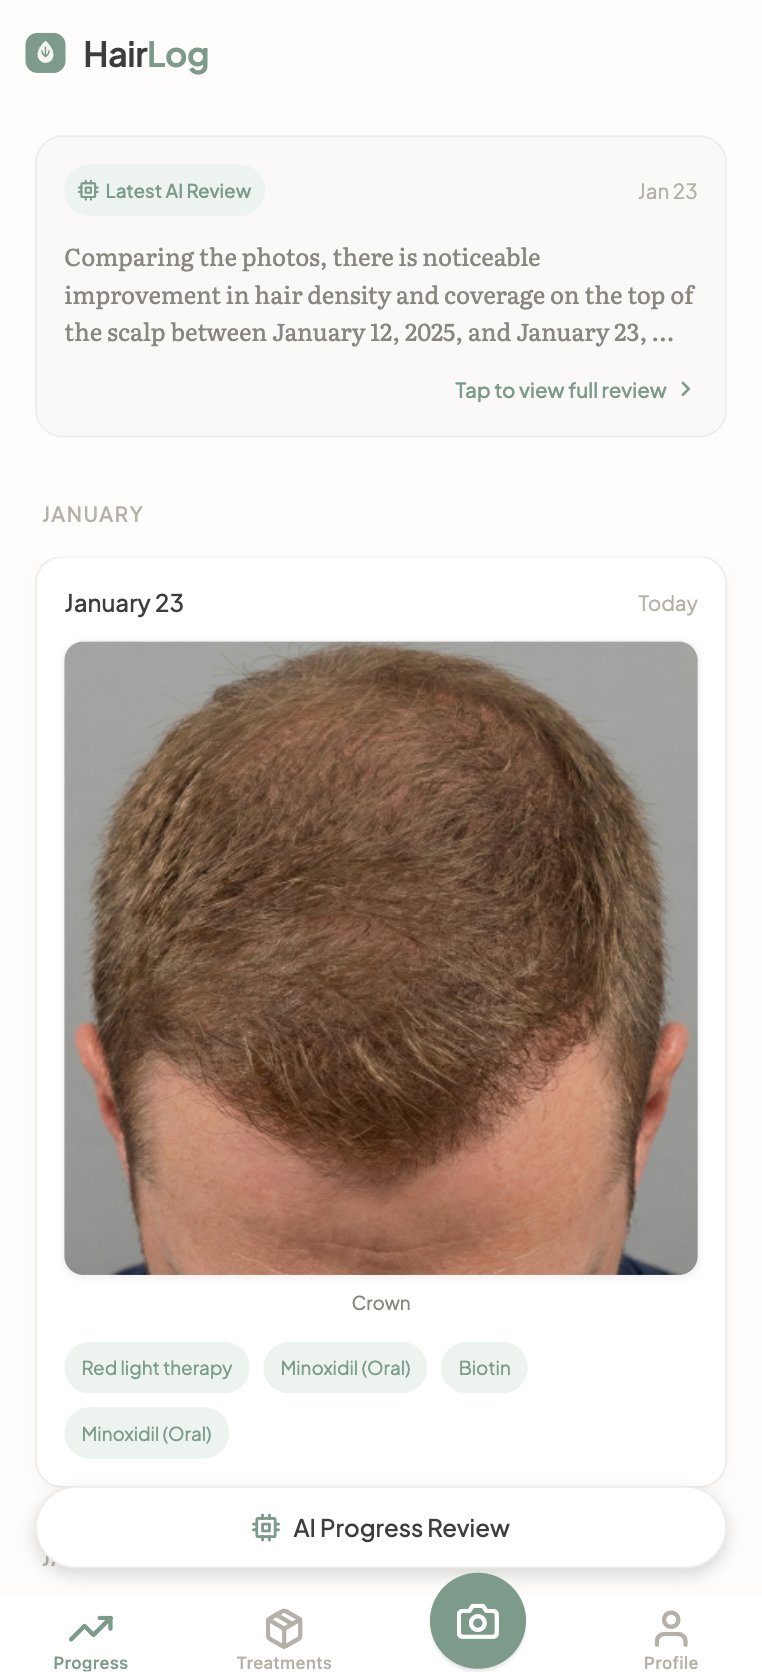
HairLog was built around this problem. The ghost-overlay camera shows your last photo of the same area faintly on screen, so you can match the angle and distance every time. Photos are organised by area (crown, hairline, temples and more) and by date, and the before/after slider lets you drag across any two photos to see changes the mirror hides.
You choose your own schedule, from weekly to every 3 months, and can turn on reminders when the next photos are due. Photos are unlimited and free forever, and they stay private.
Frequently asked questions
How often should I take hair loss progress photos?
Every 4 weeks works well for most treatments. Take a full baseline set before you start, then compare against it at months 3, 6 and 12. Photographing much more often mostly adds noise from lighting and angle.
What lighting is best for hair progress photos?
The best lighting is the same lighting every time: same room, same light source, same time of day. Soft, even light from the front is easiest to repeat. Harsh overhead light exaggerates thinning, and you shouldn't mix flash and no-flash photos.
Should my hair be wet or dry in progress photos?
Dry, unstyled and without products, ideally about the same time after washing. Wet hair clumps together and shows more scalp, which can make hair look thinner than it is.
How do I photograph my own crown?
Use the rear camera with a timer or burst mode held above the back of your head, ask someone to take it, or mount your phone at a fixed point. Keep your head tilt and the distance the same each time.
Why do my hair photos look different every time?
Small changes in light, angle, distance and hair state make hair look thicker or thinner. Fix all of them and keep to a schedule, so that differences between photos are more likely to be real changes in your hair.
Related guides
- Finasteride results timeline, month by month
What to expect on finasteride or dutasteride from the first months to the 12-month check, and when to talk to your doctor.
- Minoxidil shedding phase and results timeline
Why topical and oral minoxidil can cause shedding in weeks 2–8, how long it lasts, and when new hairs typically appear.
- Hair transplant recovery timeline
Healing, scabs, shock loss, the ugly duckling phase, first growth and the 12–18 month final result.
- Is my hair loss treatment working?
A practical way to judge any treatment: a baseline, the right time to assess, like-for-like photos and what "stable" looks like.
- HairLog: the private photo diary for hair-loss treatment
Unlimited progress photos, before/after compare and treatment check-ins, free forever.